
Welcome to Part 2!
Haven’t read Part I yet? Start here to understand how the AI-powered code review agent was built. We built all the core components for our AI agent example
Now in Part 2, we'll bring it all together by building the MCP server, configuring Claude Desktop, and testing our complete AI agent.
Table of Contents
Building the MCP Server
Now we create the MCP server that ties everything together. This is the primary entry point through which Claude Desktop communicates.
What it does:
Exposes code review functionality as MCP tools, which Claude Desktop can call using natural language.
How it works:
Initializes FastMCP server with tool definitions
Each tool is decorated with @mcp.tool() to register it
Tools receive arguments, execute logic, and return JSON responses
Global state tracks active reviews for status queries
Available tools:
detect_tech: Identifies programming language from project file
get_available_checklists: Lists available YAML checklists
get_checklist: Retrieves specific checklist details
review_code: Executes full code review with progress tracking
get_review_status: Checks status of active/completed reviews
This process supports MCP server integration and helps streamline workflows in AI-powered software development.
Example tool implementation:
from mcp.server.fastmcp import FastMCP

mcp = FastMCP(name="Code Reviewer")
active_reviews = {}

@mcp.tool()
def detect_tech(project_path: str) -> str:
    """
    Detect technology stack from a project file (e.g., package.json, pyproject.toml).

    Args:
        project_path: Absolute path to a project configuration file (not a directory)

    Returns:
        JSON string with detected technology, frameworks, and confidence
    """
    try:
        path = Path(project_path)
        if path.is_dir():
            return json.dumps({"error": "project_path must be a file, not a directory. ..."})

        if not path.exists():
            return json.dumps({"error": f"File does not exist: {project_path}", ...})

        # Get the parent directory for detection
        project_dir = str(path.parent)
        result = detect_technology(project_dir)
        return json.dumps(result, indent=2)
    except Exception as e:
        return json.dumps({"error": str(e), ...})

# Entry point
if __name__ == "__main__":
    mcp.run()
Create the file:
Create main.py with the complete MCP server implementation, including all five tools:
detect_tech() (shown above as full example)
get_available_checklists() - Similar pattern, calls ChecklistEngine
get_checklist() - Similar pattern, loads and formats YAML
review_code() - Main review tool with progress callbacks
get_review_status() - Queries active_reviews dictionary
Note: Full implementation available in the GitHub repository.
After setting up your MCP server and exploring the available tools, learn how to integrate and test your MCP server setup with real-world AI agents through our expert MCP server development consultation services.
Configuring Claude Desktop
Now we need to tell Claude Desktop how to launch our MCP server
Step 1: Find Your Configuration File
The config file location depends on your operating system:
Windows:
%APPDATA%\Claude\claude_desktop_config.jsonmacOS:
~/Library/Application Support/Claude/claude_desktop_config.jsonLinux:
~/.config/Claude/claude_desktop_config.jsonStep 2: Add Your MCP Server
Edit the config file and add this configuration. Adjust the path to match your actual project location:
For Windows:
{
  "mcpServers": {
    "mcp-code-reviewer": {
      "command": "uv",
      "args": [
        "--directory",
        "C:\\Users\\YourUsername\\code\\mcp-code-reviewer",
        "run",
        "mcp-code-reviewer"
      ],
      "env": {
        "DANGEROUSLY_OMIT_AUTH": "true"
      }
    }
  }
}
For macOS/Linux:
{
  "mcpServers": {
    "mcp-code-reviewer": {
      "command": "uv",
      "args": [
        "--directory",
        "/Users/yourname/code/mcp-code-reviewer",
        "run",
        "mcp-code-reviewer"
      ],
      "env": {
        "DANGEROUSLY_OMIT_AUTH": "true"
      }
    }
  }
}
Configuration Notes:
Replace the path with your actual project directory
On Windows, use double backslashes (\) in paths
On macOS/Linux, use forward slashes (/)
The --directory flag tells uv where your project is located
The run mcp-code-reviewer part matches the entry point in pyproject.toml
Step 3: Restart Claude Desktop
After saving the config file:
Quit Claude Desktop completely, from Task Manager as well
Restart the application
Your MCP server will start automatically when Claude Desktop launches
You can verify the connection by looking for your MCP server in Claude Desktop’s interface.
Go to the Settings
Settings will look like this, and click on the Developer option
You can verify by running the status of your local MCP server.
If the status is Failed, check the config file, close the Claude app from Task Manager, and start again.
This confirms your MCP server is properly configured and running.
Follow Docker optimization strategies to ensure smooth deployment of your AI-powered MCP server.
Testing Your Code Review Agent
You have two ways to test your code review agent: using the MCP Inspector for debugging, or through Claude Desktop for production use.
Both methods ensure your AI agent integration works smoothly before going live.
Option 1: Testing with MCP Inspector (Development)
Before integrating with Claude Desktop, you can test your MCP server using the built-in inspector. This is useful for development and debugging.
Start the MCP server in development mode:
uv run mcp dev main.py
This will start the MCP proxy server and inspector. You'll see output similar to:
Starting MCP inspector...
Proxy server listening on 127.0.0.1:6277
Session token: 79be2f530f51620ccfdc0a8b43f2c7bb31ac57b09a8649820ee8e4630f596b32
Use this token to authenticate requests or set DANGEROUSLY_OMIT_AUTH=true to disable auth


Open inspector with token pre-filled:
   http://localhost:6274/?MCP_PROXY_AUTH_TOKEN=79be2f530f51620ccfdc0a8b43f2c7bb31ac57b09a8649820ee8e4630f596b32


MCP Inspector is up and running at http://127.0.0.1:6274
Understanding the Output:
Proxy server runs on port 6277 (handles MCP communication)
Inspector UI runs on port 6274 (your browser interface)
Session token is generated for authentication
The URL includes the token pre-filled for convenience
Using the Inspector:
Open the provided URL in your browser (with token pre-filled)
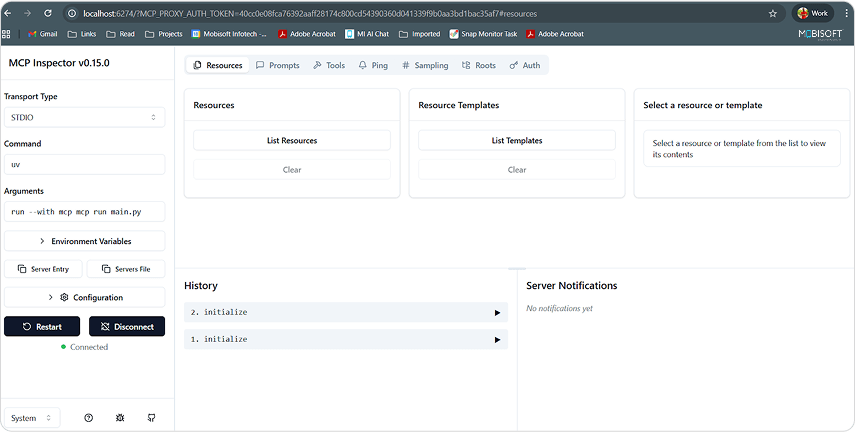
You'll see a web interface. Now click on Connect

Click on the Tools tab and then click List Tools
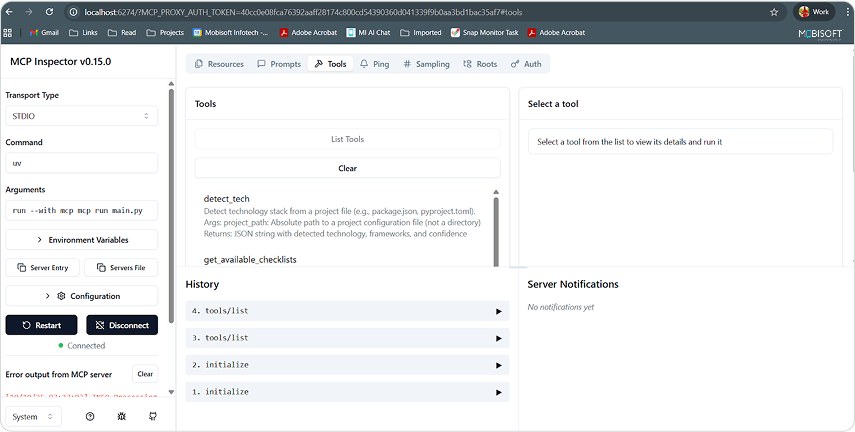
Select a tool (like detect_tech or review_code)
Enter the parameters
Click "Run" to execute and see the results
Check for errors, test edge cases, and verify outputs
This is an excellent way to debug your tools before deploying to Claude Desktop.
Option 2: Testing with Claude Desktop (Production)
Once Claude Desktop restarts with your MCP server configured, you can test it using natural language.
Example 1: Detect Technology
You: "Can you detect what technology is used in my project? The main config file is at /path/to/project/package.json"
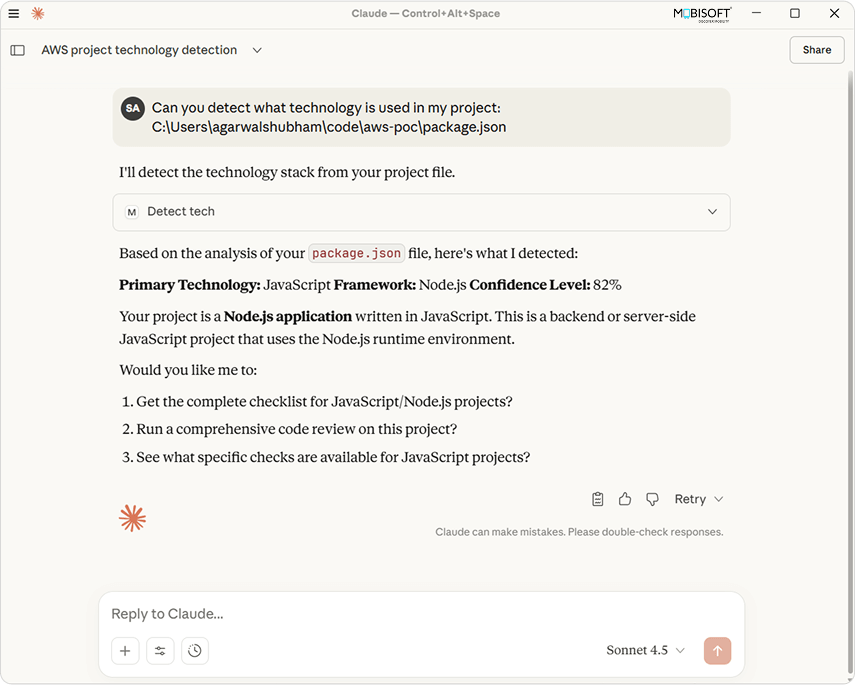
Claude will:
Use the detect_tech tool
Analyze the file and project structure
Return the detected technology, frameworks, and confidence level
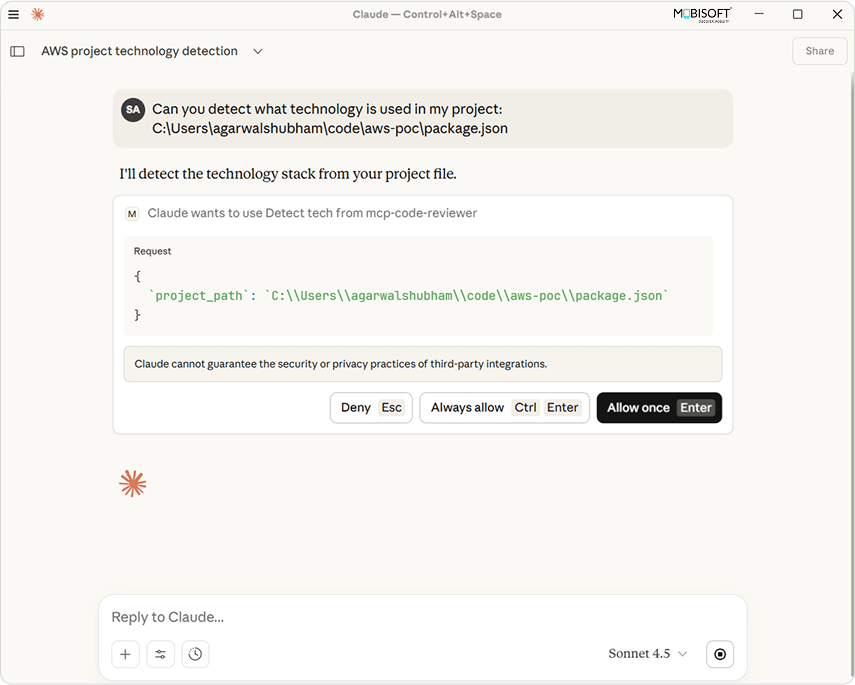
You can click Always allow or Allow Once
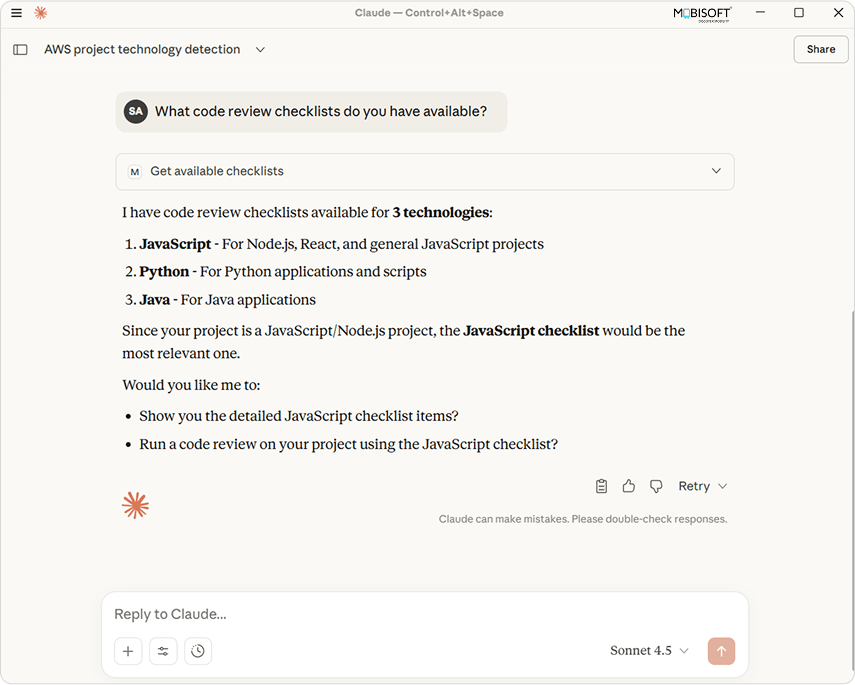
Example 2: Get Available Checklists
You: "What code review checklists do you have available?"
Claude will:
Use the get_available_checklists tool
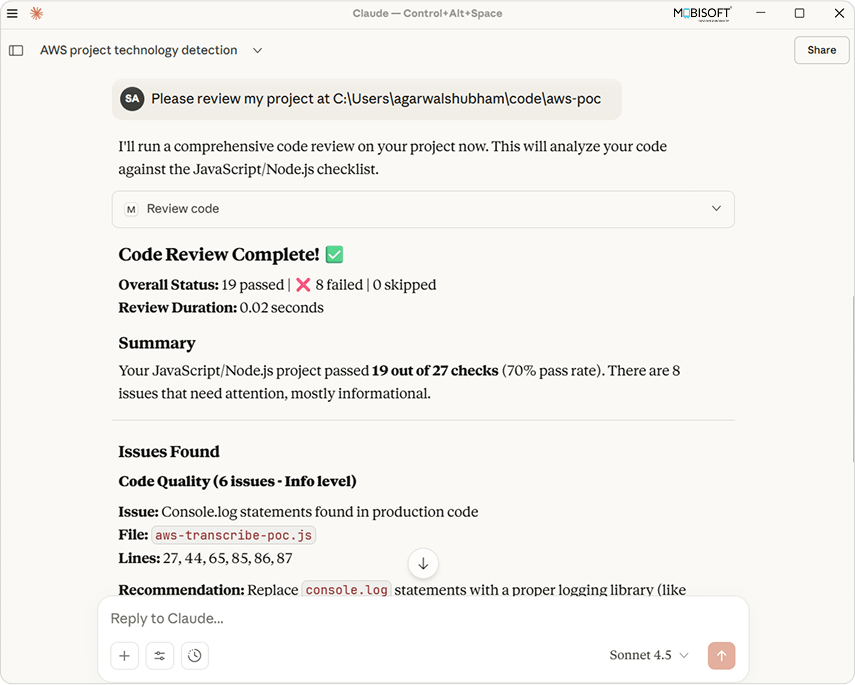
Example 3: Review Code
You: "Please review my project at /home/user/myproject"
Claude will:
Detect the technology (JavaScript)
Load the JavaScript checklist
Execute all checks
Present a summary with pass/fail counts and detailed findings
Example 5: Give me a detailed summary report
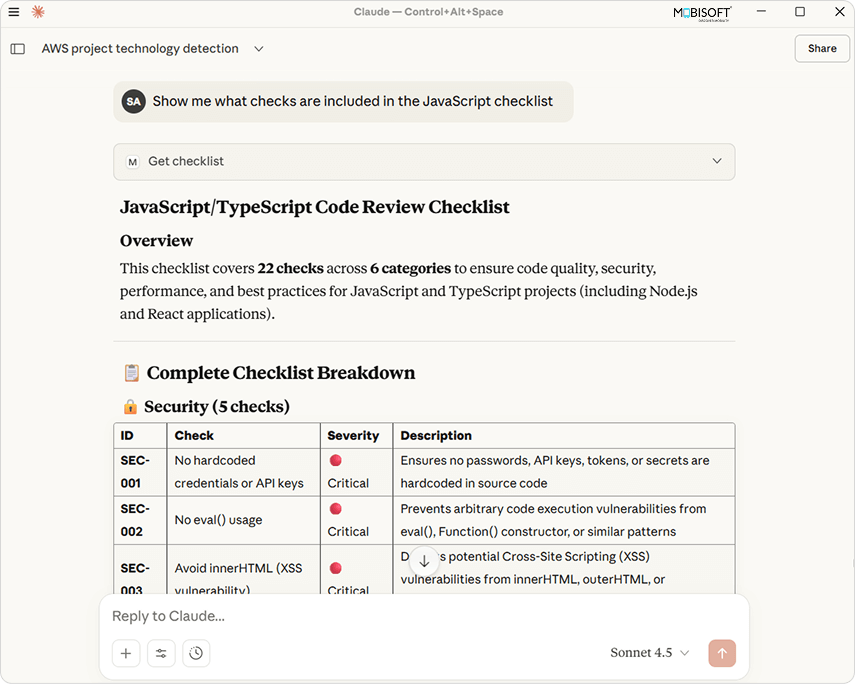
Example 4: Get Specific Checklist
You: "Show me what checks are included in the JavaScript checklist."
Claude will:
Use the get_checklist tool
Display all categories and checks for JavaScript
See how our AI services support end-to-end development, testing, and deployment of custom agents to accelerate your AI projects.


Write a comment ...